


この記事では、Excel用のOffice Scriptの基本を学び、販売記録ワークシートにフォーマットを適用するスクリプトの録音、編集、作成方法を説明します。データを入力し、オレンジの行を色付けし、その後、レモンの行にも色を追加します。次に、果物の売上データをテーブルに変換し、テーブル内のデータを昇順でソートします。スクリプトのロジックや構造を理解し、異なるワークシートでスクリプトを実行するステップも紹介されます。
Excel用のOffice Scriptの基本を学ぶ
このチュートリアルでは、Excel用のOffice Scriptを記録、編集、作成する基本を学びます。最初に、販売記録のワークシートに対していくつかのフォーマッティングを適用するスクリプトを記録します。その後、記録したスクリプトを編集して、さらにフォーマッティングを追加し、テーブルを作成し、そのテーブルをソートします。この「記録してから編集する」パターンは、Excelのアクションをコードとして見るための重要なツールです。
前提条件
このチュートリアルを進めるには、Office Scriptsにアクセスする必要があります。「Automate」タブが表示されない場合は、プラットフォームのサポートを確認してください。
データを追加し、基本的なスクリプトを記録する
まず、いくつかのデータと小さな初期スクリプトを用意します。
- 新しいExcelのワークブックを作成します。
-
以下の果物の販売データをコピーして、セルA1からワークシートに貼り付けます。
果物 2018年 2019年 オレンジ 1000 1200 レモン 800 900 ライム 600 500 グレープフルーツ 900 700 - Automateタブを開きます。「Automate」タブが表示されない場合は、リボンのオーバーフローを確認し、ドロップダウン矢印を選択してみてください。それでも表示されない場合は、Office Scriptsのトラブルシューティングを参照してください。
- Record Actionsボタンを選択します。
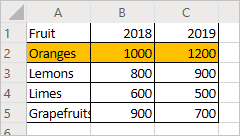
- セルA2:C2(「オレンジ」の行)を選択し、塗りつぶしの色をオレンジに設定します。
- Stopボタンを選択して記録を停止します。
ワークシートは以下のようになっているはずです(色が異なっていても心配しないでください)。
既存のスクリプトを編集する
前のスクリプトでは「オレンジ」の行がオレンジ色になりました。「レモン」の行も黄色にするために、以下の手順を実行します。
- 現在オープンしているDetailsペインで、Editボタンを選択します。
-
次のようなコードが表示されるはずです。
function main(workbook: ExcelScript.Workbook) { // Set fill color to FFC000 for range Sheet1!A2:C2 let selectedSheet = workbook.getActiveWorksheet(); selectedSheet.getRange("A2:C2").getFormat().getFill().setColor("FFC000"); }このコードは、ワークブックから現在のワークシートを取得し、範囲A2:C2の塗りつぶしの色を設定します。
-
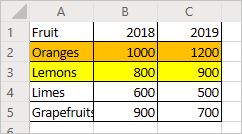
スクリプトの最後に以下の行を追加します(
colorが設定された場所の後、}の前):selectedSheet.getRange("A3:C3").getFormat().getFill().setColor("yellow"); -
Runを選択してスクリプトをテストします。ワークブックは次のようになっているはずです。
テーブルを作成する
次に、果物の販売データをテーブルに変換します。このチュートリアルを通じて、最初のスクリプトを修正し続けます。
-
スクリプトの最後に以下の行を追加します(
}の前):let table = selectedSheet.addTable("A1:C5", true); -
この呼び出しは、
Tableオブジェクトを返します。そのテーブルを使用してデータをソートします。「果物」列の値に基づいてデータを昇順にソートします。テーブル作成の後に次の行を追加します:table.getSort().apply([{ key: 0, ascending: true }]); -
スクリプトは次のようになります:
function main(workbook: ExcelScript.Workbook) {
   // Set fill color to FFC000 for range Sheet1!A2:C2
   let selectedSheet = workbook.getActiveWorksheet();
   selectedSheet.getRange("A2:C2").getFormat().getFill().setColor("FFC000");
   selectedSheet.getRange("A3:C3").getFormat().getFill().setColor("yellow");
   let table = selectedSheet.addTable("A1:C5", true);
   table.getSort().apply([{ key: 0, ascending: true }]);
}
テーブルには、
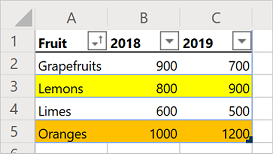
TableSortオブジェクトがあり、Table.getSortメソッドを通じてアクセスできます。 -
スクリプトを実行します。次のようなテーブルが表示されるはずです。
注意:スクリプトを再実行するとエラーが発生します。これは、別のテーブルの上にテーブルを作成できないためです。ただし、別のワークシートまたはワークブックでスクリプトを実行することはできます。
スクリプトを再実行する
- 現在のワークブックに新しいワークシートを作成します。
- チュートリアルの最初の部分から果物のデータをコピーして、作成した新しいワークシートのセルA1から貼り付けます。
- スクリプトを実行します。
次のステップ
チュートリアル: Excelワークブックデータをクリーンアップおよび正規化するを完了してください。このチュートリアルでは、Office Scriptを使用してワークブックからデータを読み取る方法を学ぶことができます。
————-
Tutorial: Create and format an Excel table – Office Scripts
Source link
The article provides a tutorial on using Office Scripts in Excel, focusing on recording, editing, and writing scripts to automate tasks. Users will learn to create a script that formats a fruit sales data worksheet by changing fill colors, creating a table, and sorting data.
Key Steps in the Tutorial:
-
Prerequisites: Access to Office Scripts is necessary. Users should ensure the Automate tab is visible in Excel.
-
Adding Data and Recording a Script:
- Create a new Excel workbook and input fruit sales data starting from cell A1.
- Open the Automate tab and record actions to color the "Oranges" row.
-
Editing an Existing Script:
- Users can edit the recorded script to include formatting for the "Lemons" row by adding code to color that row yellow.
- Understanding how to manipulate ranges is crucial, as ranges represent blocks of cells in Office Scripts.
-
Creating a Table:
- Modify the script further to convert the data into a table and sort it by the "Fruit" column in ascending order.
- The tutorial explains the code structure for applying formatting and sorting within the script.
- Re-running the Script:
- Users are advised to create a new worksheet and re-run the script, as creating a table on an existing one will lead to errors.
Next Steps:
The tutorial concludes by suggesting users proceed to a further tutorial on cleaning and normalizing Excel workbook data using Office Scripts.
This tutorial is an essential guide for beginners looking to automate Excel tasks using scripting.
コメント